Part 2: Setup Link, Database & Environment Variables in Next.js
Everything you need to know about Next.js
Overview
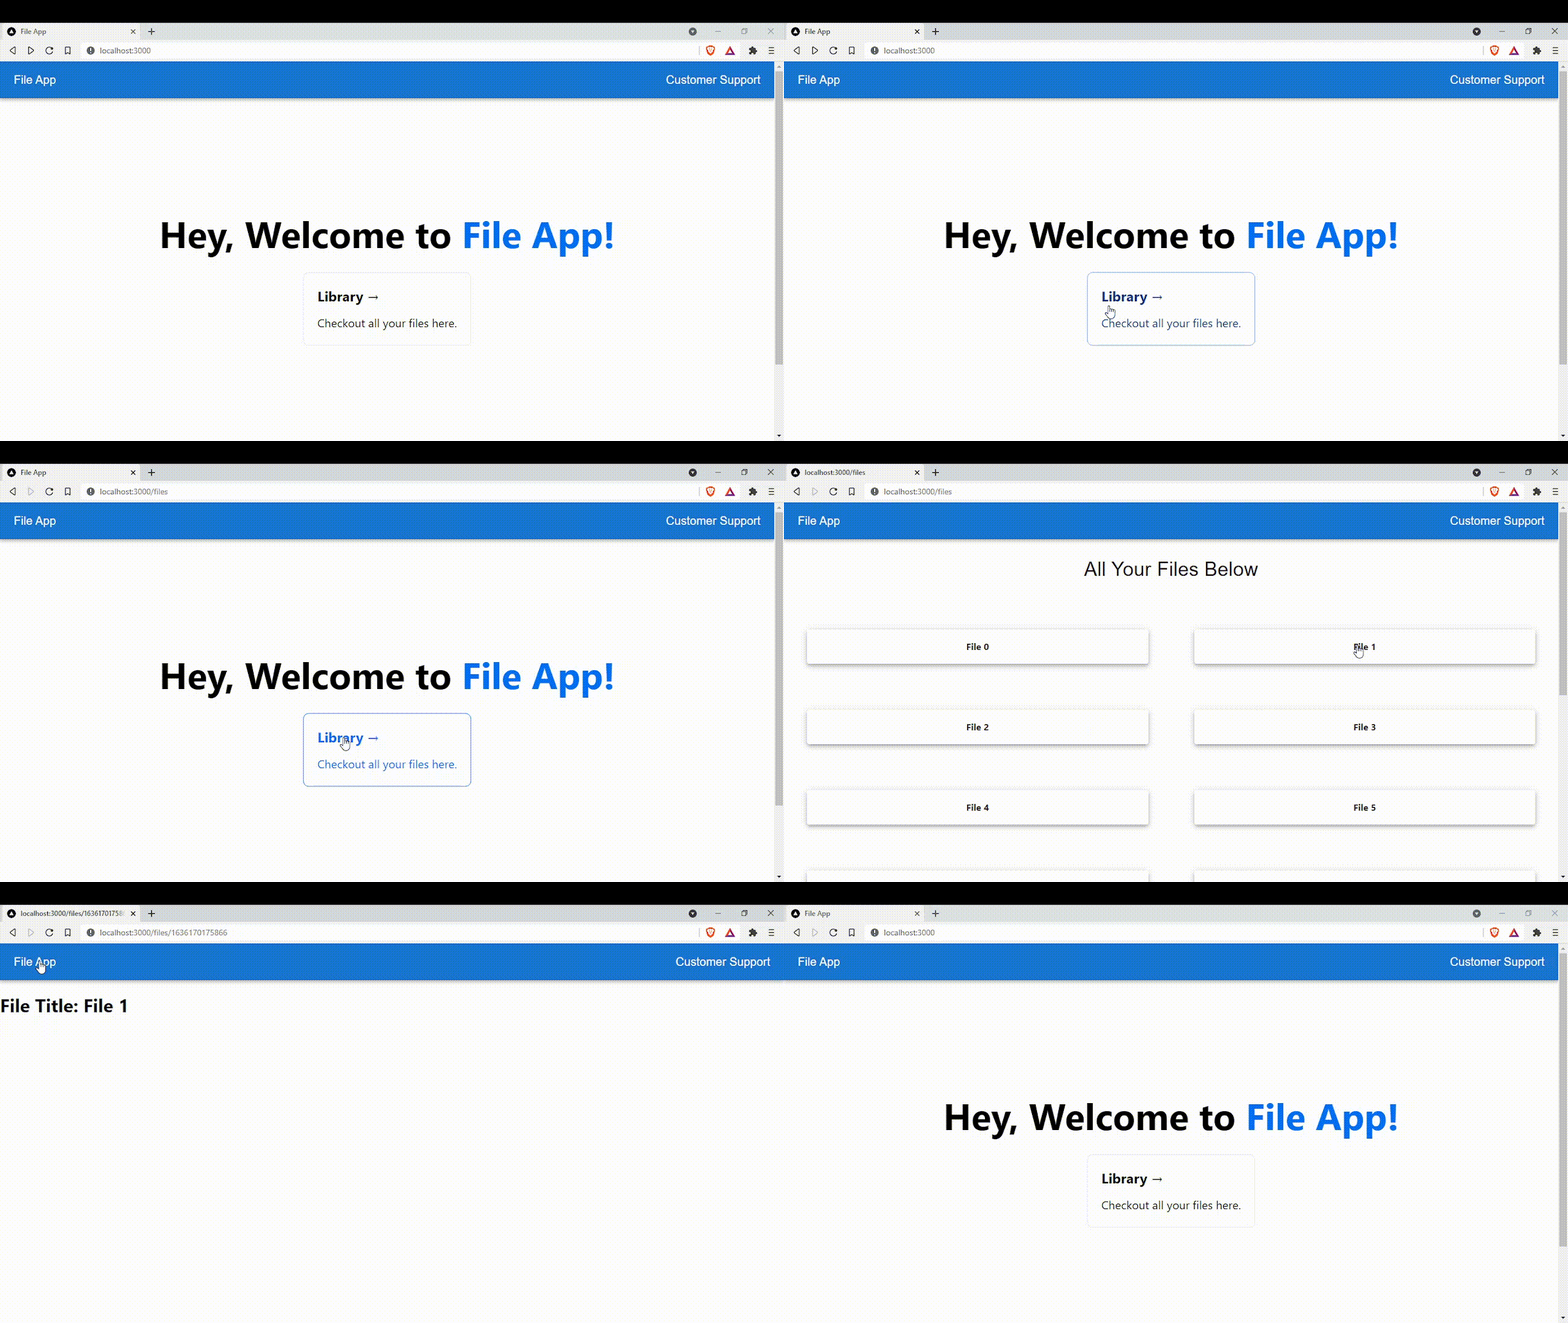
Welcome on board! In this series of articles, you'll learn everything you need to know about Next.js through project-based learning so you can get started with Next.js. If you have no idea what Next.js is, I highly recommend you to check out my newly released post here. Before we dive in, here is a sneak peek of what we're going to build:

If you've missed Part 1, I highly recommend you to check out Part 1 first before proceeding.
Setup Next.js Link component
Open up /src/components/Nav.js and /pages/index.js, and import Next.js Link component:
// /pages/index.js
import Head from "next/head";
import Image from "next/image";
import Link from "next/link"; // <-- Import Next.js Link component
import styles from "../styles/Home.module.css";
export default function Home() {
return (
<div className={styles.container}>
<Head>
<title>File App</title>
<meta name="description" content="Generated by create next app" />
<link rel="icon" href="/favicon.ico" />
</Head>
<main className={styles.main}>
<h1 className={styles.title}>
Hey, Welcome to <a>File App!</a>
</h1>
<div className={styles.grid}>
// Use Next.js Link component
<Link href="/files">
<a className={styles.card}>
<h2>Library →</h2>
<p>Checkout all your files here.</p>
</a>
</Link>
</div>
</main>
<footer className={styles.footer}>
<a
href="https://vercel.com?utm_source=create-next-app&utm_medium=default-template&utm_campaign=create-next-app"
target="_blank"
rel="noopener noreferrer"
>
Powered by{" "}
<span className={styles.logo}>
<Image src="/vercel.svg" alt="Vercel Logo" width={72} height={16} />
</span>
</a>
</footer>
</div>
);
}
// /src/components/Nav.js

import * as React from "react";
import AppBar from "@mui/material/AppBar";
import Box from "@mui/material/Box";
import Toolbar from "@mui/material/Toolbar";
import Typography from "@mui/material/Typography";
import Link from "next/link"; // <-- Import Next.js Link component

function Nav() {
  return (
    <Box sx={{ flexGrow: 1 }}>
      <AppBar position="static">
        <Toolbar>
          <Typography variant="h6" component="div" sx={{ flexGrow: 1 }}>
            // Use Next.js Link component
            <Link href="/">File App</Link>
          </Typography>

           <Typography variant="h6" component="div" sx={{ flexGrow: 0 }}>
            Customer Support
          </Typography>
        </Toolbar>
      </AppBar>
    </Box>
  );
}

export default Nav;
As said before in Part 1, Next.js has a built-in component like the Link component built for smooth client-side transitions. Above, we have added href prop and set it to the root path for Nav.js and /files path for /pages/index.js.
The href prop represents the path or URL to navigate to. It is the only required prop.
NOTE: We will create another folder in pages later on that will indicate the /files path in Next.js.
Setup Environment Variables
Noticed there is a "Customer Support" on the navbar? We will learn environment variables in Next.js by just setting it up.
On your root directory, create a file name .env.local. With a single file, you can use set up any environment variables (API key, secrets &, etc) easily in Next.js. In our case, we'll add our "Customer Support" URL inside using key-value pairs like so:
// /.env.local

SUPPORT_URL=https://google.com/
Let's get back to our Nav.js component, we are going to use the environment variable we just made in our code.
// /src/components/Nav.js

import * as React from "react";
import AppBar from "@mui/material/AppBar";
import Box from "@mui/material/Box";
import Toolbar from "@mui/material/Toolbar";
import Typography from "@mui/material/Typography";
import Link from "next/link";

function Nav() {
  return (
    <Box sx={{ flexGrow: 1 }}>
      <AppBar position="static">
        <Toolbar>
          <Typography variant="h6" component="div" sx={{ flexGrow: 1 }}>
            <Link href="/">File App</Link>
          </Typography>

          <Typography variant="h6" component="div" sx={{ flexGrow: 0 }}>
            // This is where you implement your environment variable
            <a href={process.env.SUPPORT_URL} target="_blank" rel="noreferrer">
              Customer Support
            </a>
          </Typography>
        </Toolbar>
      </AppBar>
    </Box>
  );
}

export default Nav;
The process.env allows us to access our environment variables stored in .env.local file. In our case, our environment variable is SUPPORT_URL. Since we set our SUPPORT_URL to Google.com, once a user presses "Customer Support", the user will be redirected to Google.com.
Setup Database
We are not going to make it complicated by using a real database instead we're going to use a mock in-memory database to represent the data we need in our app.
Create a folder name data inside /src, inside /src/data create a file name mock-db.js. The code below is how you can setup a mock in-memory database:
// /src/data/mock-db.js

const file_db = new Array(16).fill(1).map((_, i) => ({
  id: Date.now() + i,
  title: `File ${i}`,
}));

module.exports = file_db;
Conclusion
We've successfully set up a Next.js Link component, create a mock database & learn how to use environment variables in Next.js. There are still more to come, we will be going to learn about data fetching, API routes, and more in the next article. If you're interested in following up with this tutorial which I will be releasing soon, do consider following me on Hashnode. Happy learning!
